Git command yang paling sering digunakan

  • List all local branches:
    git branch

    This command will show all local branches, with the current branch highlighted.

  • List branches with recent commits: To see the most recently active branches along with the last commit on each, you can use:
    git branch --sort=-committerdate --format="%(refname:short) - %(committerdate:relative)"

    This will list the branches sorted by the last commit date, showing how long ago the last commit was made.

  • List recently checked-out branches: To show branches that have been checked out recently (useful to see your working history):
    git reflog

    This will display a log of all your recent Git actions, including branch checkouts. You can look for checkout actions to see which branches you’ve been switching between.


The Ultimate Guide to Setting Up Your MacBook for Web Development

Setting up your MacBook for web development involves installing a variety of tools and software that streamline your workflow and enhance productivity. This guide combines the essential steps and tools required to configure your MacBook as a powerful development environment.

1. Show Hidden Files

To display hidden files in Finder, open Terminal and type the following command:

defaults write com.apple.Finder AppleShowAllFiles true
killall Finder

Alternatively, you can press Shift + Command + . to toggle hidden files.

2. Mission Control Setup

Configure Mission Control to optimize your workspace by setting up hot corners, spaces, and other options through System Preferences.

3. Homebrew Installation

Homebrew is a package manager for macOS, making it easy to install and manage software. Install Homebrew with the following command:

/bin/bash -c "$(curl -fsSL https://raw.githubusercontent.com/Homebrew/install/HEAD/install.sh)"

Update and upgrade Homebrew by running:

brew update && brew upgrade && brew cleanup && brew doctor

4. Terminal & Shell Enhancements

  • iTerm2: Install iTerm2, a powerful terminal emulator:
    brew install --cask iterm2
  • Git: Install Git for version control:
    brew install git
  • Zsh: Install Zsh, a feature-rich shell:
    brew install zsh

    To set Homebrew’s Zsh as the default shell, edit the shell’s whitelist:

    sudo vim /etc/shells

    Add /usr/local/bin/zsh, then change the default shell:

    chsh -s /usr/local/bin/zsh

    Restart the terminal and verify by running echo $SHELL.

  • Oh My Zsh: Install Oh My Zsh for managing Zsh configurations:
    sh -c "$(curl -fsSL https://raw.github.com/ohmyzsh/ohmyzsh/master/tools/install.sh)"

    Enhance Zsh with plugins like zsh-syntax-highlighting and zsh-autosuggestions.

5. Development Tools Installation

  • Docker: Install Docker for containerization:
    brew install --cask docker

    Consider using Lazydocker for a simple Docker GUI:

    brew install jesseduffield/lazydocker
  • Visual Studio Code: Install VS Code, a popular code editor:
    brew install --cask visual-studio-code
  • Rectangle: Manage window arrangements with Rectangle:
    brew install --cask rectangle
  • Alfred: Install Alfred for advanced search and productivity:
    brew install --cask alfred

6. Additional Development Tools

  • PHPStorm: A powerful IDE for PHP development.
  • Postman: Essential for API testing and development.
  • Blocsapp: A visual web design tool.
  • Laravelshift: A tool for automating Laravel upgrades.
  • Treblle: Helps monitor and debug APIs.
  • Getmedis: A Redis GUI manager.

7. Database Management Tools

  • TablePlus: A modern, user-friendly database management tool.
  • MySQL Workbench: A comprehensive tool for MySQL database management.
  • DBeaver: A universal database management tool.
  • Another Redis Desktop Manager: A GUI for managing Redis databases.

8. Other Essential Tools

  • CyberDuck: An FTP/SFTP client for file transfers.
  • Boop: A snippet manager for organizing reusable code.
  • HTTP Toolkit: This is for debugging and testing HTTP/HTTPS traffic.
  • Sourcetree: A Git GUI client for managing repositories.
  • Typora: A Markdown editor with a live preview feature.
  • VirtualBox: A platform for running multiple operating systems.
  • Lens Kubernetes: An IDE for managing Kubernetes clusters.
  • Warp Terminal: A customizable terminal emulator with advanced features.
  • Anki: A flashcard application for memorization.
  • Goland: An IDE specifically for Go programming.
  • TextSniper: A tool for capturing text from your screen.
  • Genymotion: An Android emulator for testing and running Android apps.
  • 1Password: A password manager for securely storing and managing credentials.
  • AltTab: A window switcher for enhancing productivity on macOS.
  • BetterTouchTool: A macOS customization tool for creating custom gestures and shortcuts.
  • Boom 3D: A sound enhancement app for 3D surround sound and equalization.
  • DataGrip: A database management tool for various database systems.
  • Folx: A download manager for splitting downloads and faster file transfers.
  • PyCharm: An IDE for Python programming.
  • Spectacle: A window management app for macOS.
  • Grammarly: A writing assistant for grammar and spell-checking

Conclusion

By following this guide, you’ll have a well-configured MacBook tailored for web development. These tools and configurations will enhance your productivity, streamline your workflow, and ensure you have the right setup to tackle any development challenge.


Managing Environment Variables in Production with AWS Secrets Manager

Mengubah environment variable di produksi bisa menjadi proses yang rumit dan memakan waktu, terutama jika Anda harus membuat Image baru AMI AWS setiap kali ada perubahan. AWS Secrets Manager menawarkan solusi yang lebih efisien dan aman.

Manfaat AWS Secrets Manager

  • Keamanan: Menyimpan secrets dengan aman dan hanya diakses oleh pihak yang berwenang.
  • Efisiensi: Memperbarui secrets tanpa membuat AMI baru atau mengubah kode aplikasi.
  • Biaya Terjangkau: $0.40 per secret per bulan, dengan setiap secret bisa berisi beberapa key=value pairs hingga 10KB.

Langkah-Langkah Menggunakan AWS Secrets Manager

1. Install AWS CLI Terbaru

apt-get install -y python3-pip jq
pip3 install awscli --upgrade

2. Ekstraksi Secrets ke File .env

AWS_SECRET_ID="my-super-secret-secret"
AWS_REGION="ap-southeast-2"
ENVFILE="/srv/app/.env"

# Export the secret to .env
aws secretsmanager get-secret-value --secret-id $AWS_SECRET_ID --region $AWS_REGION | \
  jq -r '.SecretString' | \
  jq -r "to_entries|map(\"\(.key)=\\\"\(.value|tostring)\\\"\")|.[]" > $ENVFILE

Dengan menggunakan AWS Secrets Manager, Anda dapat mengelola environment variable dengan lebih mudah, aman, dan efisien tanpa perlu membuat AMI baru setiap kali ada perubahan.


How to Prevent macOS from Bringing All Windows to the Front When Switching to an App

If you’re a macOS user with a multi-display setup, you may have experienced the frustration of having all windows of an app brought to the front when switching to that app. This can be particularly annoying if you have multiple windows of the same app open on different displays. For instance, you might be writing on one display and viewing reference material on another. When you switch to an app like Google Chrome, all its windows are brought to the front, which covers the windows on both displays and disrupts your workflow.

The Problem

By default, macOS brings all windows of an app to the front when you switch to that app. This behaviour can be problematic in a multi-display setup for a few reasons:

  1. Disruption of Workflow: If you’re writing on one display and using reference material on the other, switching to an app can cause your reference material to be covered by the app windows from the other display.
  2. Unnecessary Clutter: Bringing all windows to the front can create unnecessary clutter, making it harder to focus on the task at hand.

This issue persists even if you have set your displays to have separate Spaces in macOS.

The Solution

Fortunately, there is a solution to this problem: using a third-party app called AltTab.


Example App Scripts Google Form, Sending All response to Whatsapp

function onFormSubmit(e) {
  record_array = []

  var form = FormApp.openById('1mYTARCa3_WEQU2YqWVjtp5tAlvGv4KW2bixxx'); // Form ID
  var formResponses = form.getResponses();
  var formCount = formResponses.length;

  var formResponse = formResponses[formCount - 1];
  var itemResponses = formResponse.getItemResponses();

  var resultString = '';

  for (var j = 0; j < itemResponses.length; j++) {
    var itemResponse = itemResponses[j];
    var title = itemResponse.getItem().getTitle();
    var answer = itemResponse.getResponse();

    record_array.push(answer);
    resultString += title + ': ' + answer + '\n';
    
  }  

  Logger.log(resultString)

  // Send the resultString to an external API
  var apiUrl = 'https://apiservice.com/v1/wa/send'; // Replace with your API endpoint
  var options = {
    'method': 'post',
    'contentType': 'application/json',
    'payload': JSON.stringify({ message: resultString, phone: "628XX250XXXX" })
  };

  try {
    var response = UrlFetchApp.fetch(apiUrl, options);
    Logger.log('Response Code: ' + response.getResponseCode());
    Logger.log('Response Body: ' + response.getContentText());
  } catch (error) {
    Logger.log('Error: ' + error.message);
  }
}

FORM ID from URL https://docs.google.com/forms/d/1mYTARCa3_WEQU2YqWVjtp5tAlvGv4KW2bimfqrdQCnQ/edit#responses


Compress Directory with Tar

Compress
tar -czvf name-of-archive.tar.gz /path/to/directory-or-file

-c: Create an archive.
-z: Compress the archive with gzip.
-v: Display progress in the terminal while creating the archive, also known as “verbose” mode. The v is always optional in these commands, but it’s helpful.
-f: Allows you to specify the filename of the archive.

Extract
tar -xzvf archive.tar.gz


Example AWS Cloudwatch Agent Config

cat /opt/aws/amazon-cloudwatch-agent/bin/config.json
{
        "agent": {
                "metrics_collection_interval": 600,
                "run_as_user": "root"
        },
        "logs": {
                "logs_collected": {
                        "files": {
                                "collect_list": [
          {
                                                "file_path": "/var/log/nginx/access_json.log",
                                                "log_group_name": "nginx_access_json",
                                                "log_stream_name": "nginx_access_json"
                                        },
                                        {
                                                "file_path": "/var/www/html/app/storage/logs/laravel.log",
                                                "log_group_name": "log_app",
                                                "log_stream_name": "error_logs"
                                        },
                                        {
                                                "file_path": "/var/www/html/app/storage/logs/worker.log",
                                                "log_group_name": "log_app",
                                                "log_stream_name": "worker_logs"
                                        }
          
                                ]
                        }
                },
    "force_flush_interval" : 900,
                "log_stream_name": "my_log_stream_name"
        },
        "metrics": {
                "aggregation_dimensions": [
                        [
                                "AutoScalingGroupName"
                        ]
                ],
                "append_dimensions": {
                        "AutoScalingGroupName": "${aws:AutoScalingGroupName}",
                        "ImageId": "${aws:ImageId}",
                        "InstanceId": "${aws:InstanceId}",
                        "InstanceType": "${aws:InstanceType}"
                },
                "metrics_collected": {

                        "mem": {
                                "measurement": [
                                        "mem_used_percent"
                                ],
                                "metrics_collection_interval": 60
                        }
                }
        }
}


How to check whether my user data passing to EC2 instance is working

You can verify using the following steps:

  1. SSH on launch EC2 instance.
  2. Check the log of your user data script in:
    • /var/log/cloud-init.log and
    • /var/log/cloud-init-output.log

You can see all logs of your user data script, and it will also create the /etc/cloud folder.

Source: https://stackoverflow.com/questions/15904095/how-to-check-whether-my-user-data-passing-to-ec2-instance-is-working


Why do programmers need private offices with doors?

  1. Concentration: Programmers need a quiet and calm environment to concentrate on their tasks. Private offices with doors provide the necessary level of privacy and minimize noise distractions from co-workers.
  2. Reduced interruptions: Programmers often need to focus for extended periods, and interruptions can disrupt their workflow and train of thought. With a private office, they have control over their space and can limit interruptions from colleagues.
  3. Increased productivity: By having a dedicated workspace, programmers can personalize their environment to suit their needs and preferences. This can lead to increased comfort and productivity.
  4. Confidentiality and security: In some cases, programmers may work on sensitive projects or handle proprietary information. Having a private office provides an added layer of privacy and security for their work.
  5. Collaboration when needed: While private offices provide the isolation needed for deep work, it’s still important for programmers to collaborate with colleagues. However, this collaboration can take place in dedicated meeting rooms or online communication tools, such as chat rooms and video conferencing. This ensures that collaboration happens intentionally and doesn’t disrupt individual work.


  • https://www.reddit.com/r/programming/comments/18l88xq/why_do_programmers_need_private_offices_with/
  • https://stackoverflow.blog/2015/01/16/why-we-still-believe-in-private-offices/
  • https://softwareengineering.stackexchange.com/questions/8104/why-should-developers-have-private-offices
  • https://www.linkedin.com/pulse/open-offices-causing-employees-leave-heres-why-chris-peng/


Using ‘Had’ to Talk about the Past in English

The verb “had” is the past tense of “have.” In English, you use “had” to talk about something that happened in the past. For example, if you wanted to say that you ate breakfast today, you would say “I had breakfast today.”
It’s important to use “had” when you’re talking about something that is no longer happening in the present. So if you ate breakfast a few hours ago, you would say “I had breakfast this morning,” not “I have breakfast this morning.”
“Had” is a versatile verb that can be used in a variety of contexts, so it’s worth practicing using it in different sentences to get a feel for how it works.


Exploring Standard Domains for Testing “Throwaway” Email Addresses

In the vast landscape of the internet, testing and anonymity are crucial aspects, and throwaway email addresses serve as valuable tools for these purposes. Whether you’re signing up for a trial service, verifying an account, or simply exploring the web discreetly, throwaway email addresses come to the rescue. In this article, we’ll explore the concept of throwaway email addresses, a standard domain for testing, and a popular platform for disposable email.

1. The Standard Domain for Testing: RFC 2606

When it comes to testing, the internet community adheres to certain standards to avoid conflicts with real domains. The Internet Engineering Task Force (IETF) introduced RFC 2606, outlining reserved top-level domains (TLDs) for documentation and testing purposes. Two notable examples from RFC 2606 are:

  • example.com
  • example.net

These domains are safe to use in any scenario where you need a placeholder or demonstration without the risk of real-world consequences.

2. Guerrilla Mail: Your Go-To for Disposable Email

One popular platform for throwaway email is Guerrilla Mail (https://www.guerrillamail.com/). Guerrilla Mail provides temporary, anonymous email addresses that expire after a certain period. It’s a handy solution for avoiding spam and maintaining privacy when engaging in online activities that require an email address.

3. 20 Example “Throwaway” Email Addresses:

Now, let’s generate 20 example throwaway email addresses using the RFC 2606 standard domain and Guerrilla Mail:

  1. [email protected]
  2. [email protected]
  3. [email protected]
  4. [email protected]
  5. [email protected]
  6. [email protected]
  7. [email protected]
  8. [email protected]
  9. [email protected]
  10. [email protected]
  11. [email protected]
  12. [email protected]
  13. [email protected]
  14. [email protected]
  15. [email protected]
  16. [email protected]
  17. [email protected]
  18. [email protected]
  19. [email protected]
  20. [email protected]

Feel free to use any of these addresses for your testing needs, and remember that they follow the guidelines set by RFC 2606.

In conclusion, throwaway email addresses are invaluable tools for testing and maintaining online privacy. By leveraging standard domains like those outlined in RFC 2606 and platforms like Guerrilla Mail, users can explore the internet with confidence, knowing their primary email addresses remain secure. The provided examples offer a starting point for creating disposable email addresses tailored to your specific needs.


tree Command: Navigating Directory Structures

tree -I tmp -C

  • tree: This is a command-line utility that displays the contents of a directory in a tree-like format.
  • -I tmp: This option is used to exclude a specific pattern or directory from the tree view. In this case, it excludes any directories or files with the name “tmp.”
  • -C: This option is used to colorize the output, making it more visually appealing by using different colors for different types of files.

So, when you run the command tree -I tmp -C, it will display the directory structure, excluding anything with the name “tmp” and using colorized output for better readability.


How to install

brew install tree


Exploring Public Code Repositories with Sourcegraph

Sourcegraph, a powerful code search and intelligence platform, provides developers with a comprehensive tool for exploring and understanding code across various repositories. With its user-friendly interface and advanced search capabilities, Sourcegraph empowers developers to efficiently navigate through extensive codebases, discover patterns, and gain insights into public code repositories.


https://sourcegraph.com/search


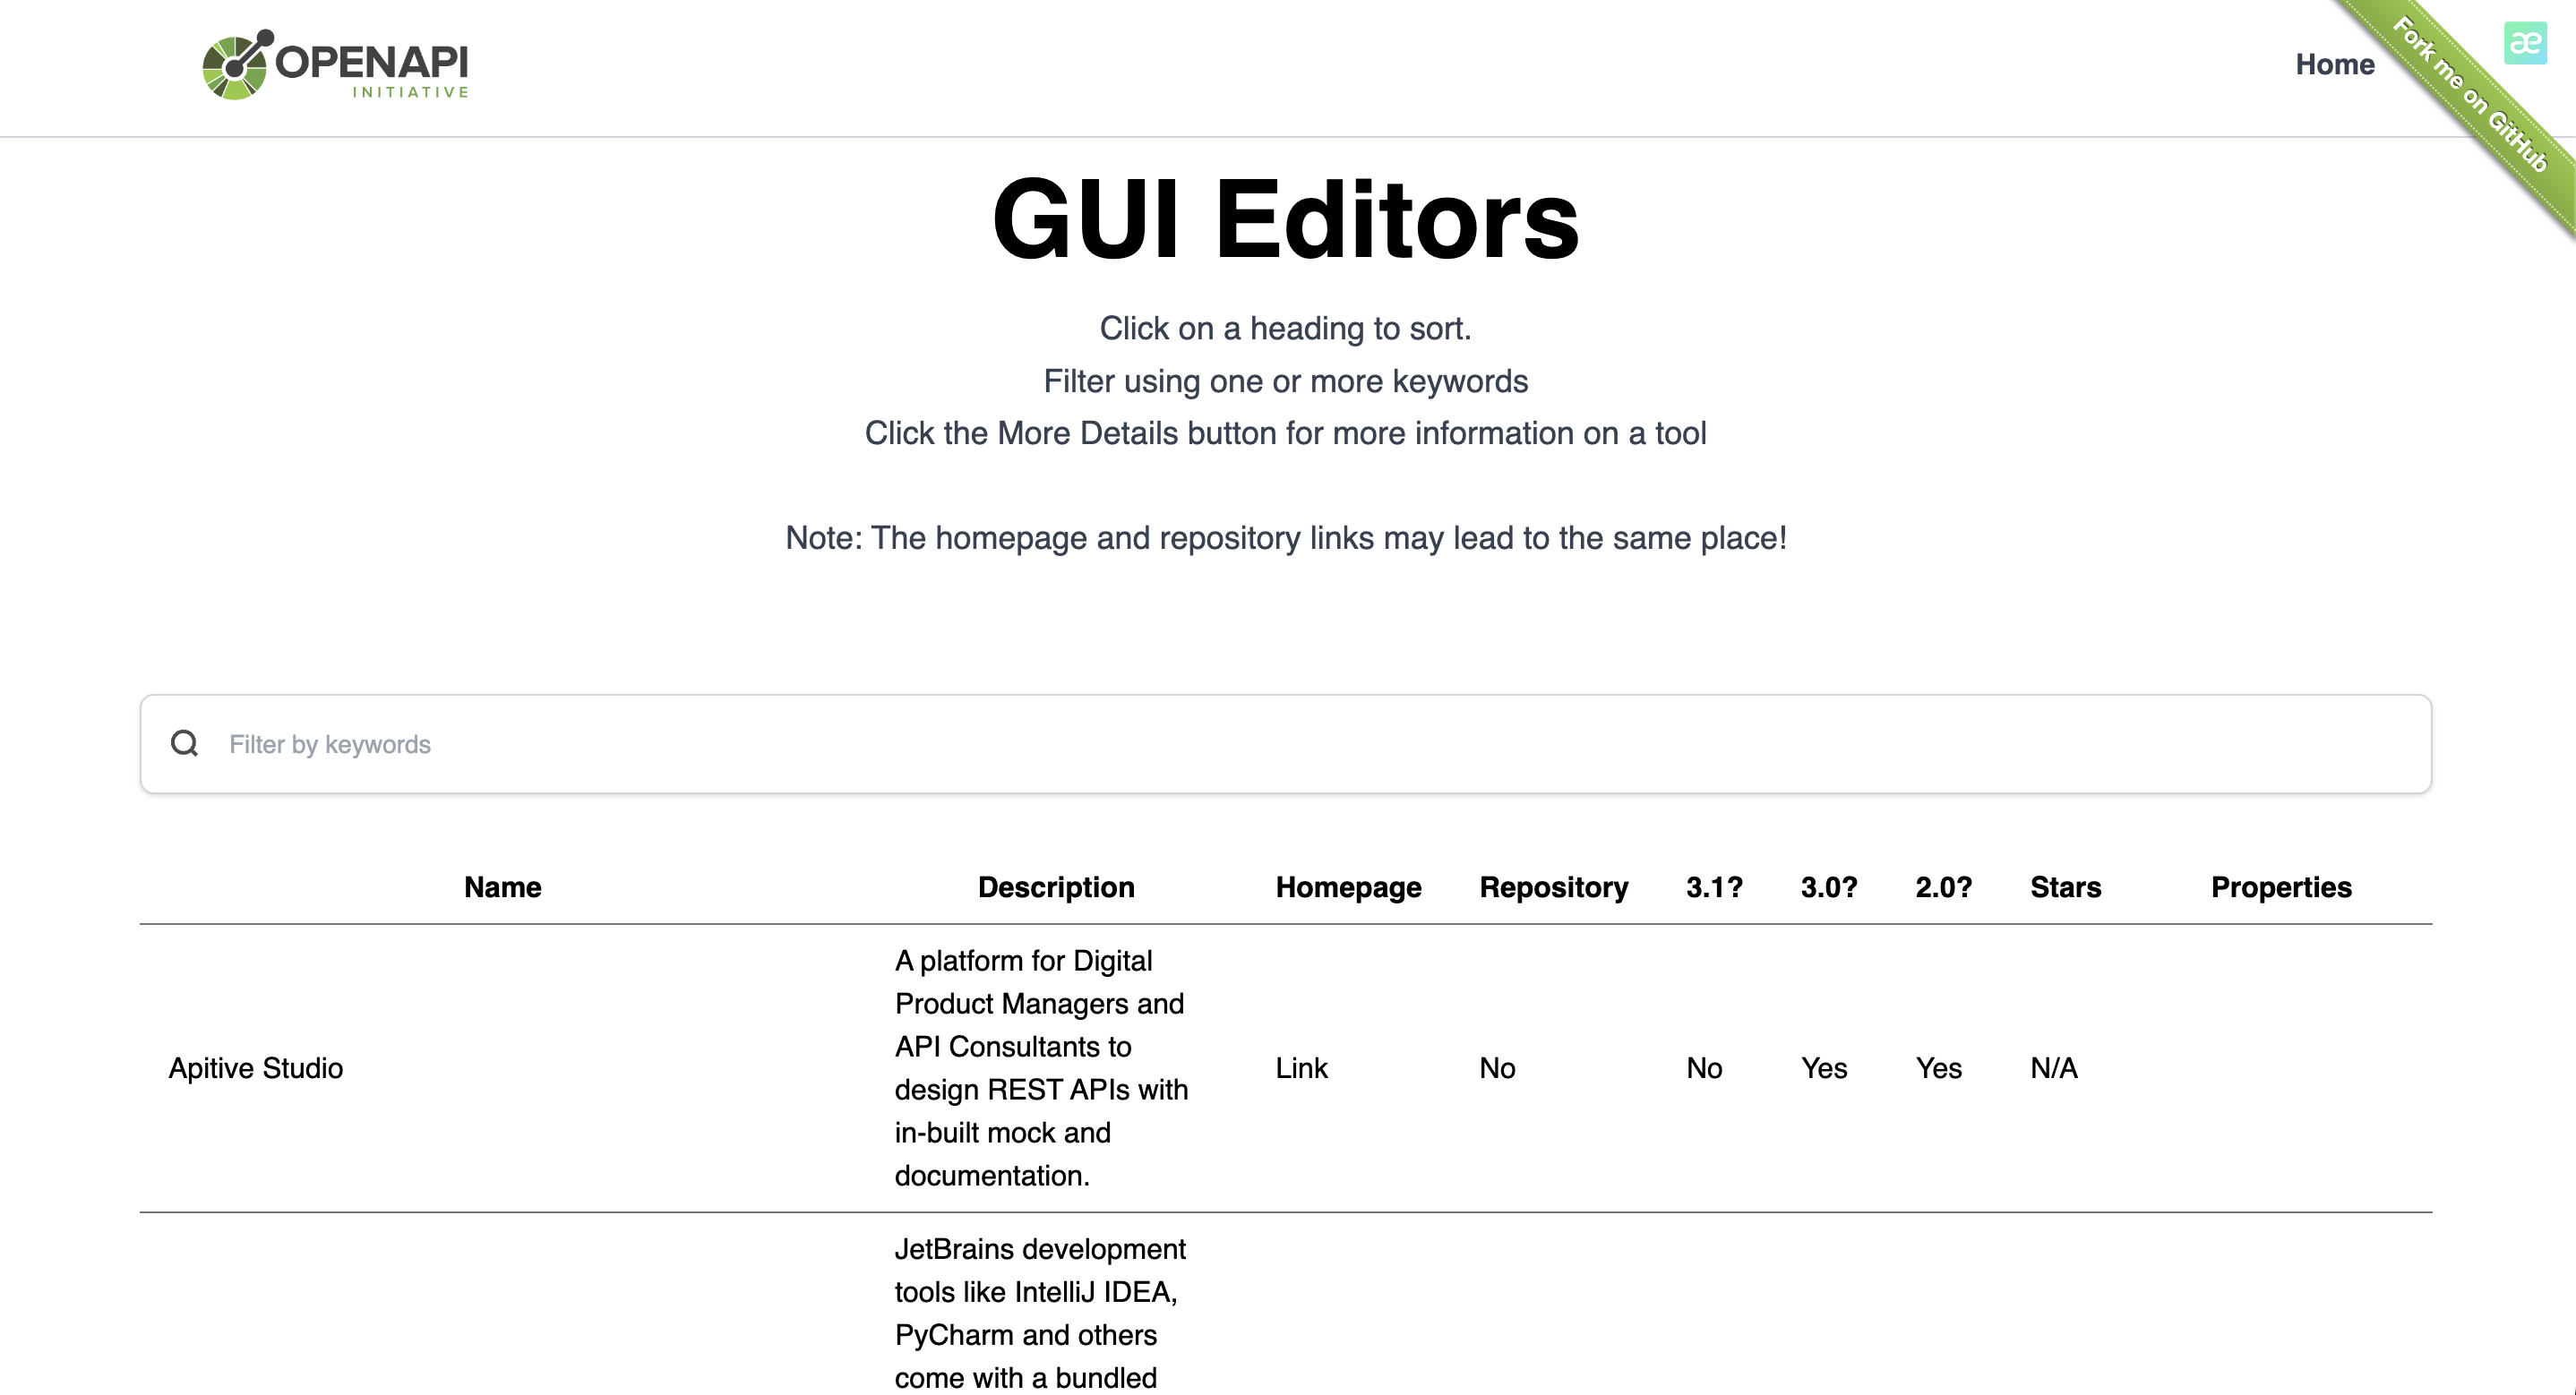
GUI Editor for OpenAPI/Swagger

Untuk membuat spesifikasi API ini dengan cepat dan efisien, Anda memerlukan editor GUI yang dapat memudahkan dengan baik.

Pilihan Saya adalah Stoplight Studio dan ApiBldr.

Stoplight Studio menawarkan fitur yang canggih dan kemampuan kolaborasi tim yang kuat, sementara ApiBldr menonjol dengan kemudahan penggunaan dan desain minimalisnya.

GUI Editor lainnya bisa dilihat di https://tools.openapis.org/categories/gui-editors.html


Awesome REST GitHub Repository

“Awesome REST” adalah sumber daya yang sangat berharga bagi para pengembang API RESTful. Dengan berbagai jenis sumber daya yang tersedia di dalamnya, repositori ini membantu pengembang dalam merancang, mengembangkan, dan mengelola API RESTful dengan lebih efisien.

Akses Repositori: Kunjungi tautan GitHub “Awesome REST” di https://github.com/marmelab/awesome-rest.


How to install InfluxDB using Docker


mkdir influxdb
cd influxdb
vim docker-compose.yml
version: '3.8'

services:
  influxdb:
    image: quay.io/influxdb/influxdb:v2.0.4
    ports:
      - "8086:8086"
    environment:
      - DOCKER_INFLUXDB_INIT_MODE=setup
      - DOCKER_INFLUXDB_INIT_USERNAME=admin
      - DOCKER_INFLUXDB_INIT_PASSWORD=adminpassword
      - DOCKER_INFLUXDB_INIT_ORG=mycompany
      - DOCKER_INFLUXDB_INIT_BUCKET=geoip2influx
    volumes:
      - ./influxdb-data:/var/lib/influxdb2
    networks:
      - influxdb-net

networks:
  influxdb-net:

Install InfluxDB Client

wget https://dl.influxdata.com/influxdb/releases/influxdb2-client-2.7.3-linux-amd64.tar.gz
tar xvzf influxdb2-client-2.7.3-linux-amd64.tar.gz
sudo cp influx /usr/local/bin/

Create config influxDB client

influx config create --config-name defaul-config --host-url http://localhost:8086 --org mycompany --token KIRocbUKK8dQ1knGakgs_QUtXqsbzH0b_YACP83Jqzl8nyc6Pye_dVK_yFO6RK_GX53kRwqu2ddxqHXEXG-b7nUQ==  --active


How to install Loki and Promtail use Docker


mkdir grafana_configs
cd grafana_configs
sudo wget https://raw.githubusercontent.com/grafana/loki/v2.8.0/cmd/loki/loki-local-config.yaml -O loki-config.yaml
sudo wget https://raw.githubusercontent.com/grafana/loki/v2.8.0/clients/cmd/promtail/promtail-docker-config.yaml -O promtail-config.yaml
docker run -d --name loki -v $(pwd):/mnt/config -p 3100:3100 grafana/loki:2.8.0 --config.file=/mnt/config/loki-config.yaml
docker run -d --name promtail -v $(pwd):/mnt/config -v /var/log:/var/log --link loki grafana/promtail:2.8.0 --config.file=/mnt/config/promtail-config.yaml


How to install Grafana

Use APT

sudo apt-get install -y apt-transport-https
sudo apt-get install -y software-properties-common wget
sudo wget -q -O /usr/share/keyrings/grafana.key https://apt.grafana.com/gpg.key
sudo apt-get update
sudo apt-get install -y apt-transport-https
sudo apt-get install -y software-properties-common wget
sudo wget -q -O /usr/share/keyrings/grafana.key https://apt.grafana.com/gpg.key
echo "deb [signed-by=/usr/share/keyrings/grafana.key] https://apt.grafana.com stable main" | sudo tee -a /etc/apt/sources.list.d/grafana.list
sudo apt-get update
sudo apt-get install grafana
sudo systemctl start grafana-server

Use Docker

docker-compose.yml

version: '3'

services:
  grafana:
    image: grafana/grafana:latest
    container_name: grafana
    ports:
      - "3000:3000"  # Map Grafana's web UI to port 3000 on your host
    volumes:
      - grafana_data:/var/lib/grafana  # Persist Grafana data
    environment:
      - GF_SECURITY_ADMIN_USER=admin  # Grafana admin user
      - GF_SECURITY_ADMIN_PASSWORD=adminpassword  # Grafana admin password
    networks:
      - monitoring

volumes:
  grafana_data:  # Define a named volume for Grafana data

networks:
  monitoring:  # Create a custom bridge network for Grafana and other monitoring tools


UID (User Identifier) di Linux

UID adalah singkatan dari User Identifier. Ini adalah angka unik yang digunakan oleh sistem Linux untuk mengidentifikasi setiap pengguna dalam sistem. Saat seorang pengguna dibuat, sistem memberikan UID unik kepadanya. UID ini digunakan oleh sistem untuk mengenali pengguna secara internal, dan ini adalah bagian penting dari manajemen hak akses di Linux.

Untuk melihat UID pengguna di Linux, Anda dapat menggunakan perintah id. Misalnya, untuk melihat UID Anda sendiri, jalankan perintah berikut:
id

Untuk membuat pengguna baru dengan UID tertentu, Anda dapat menggunakan perintah useradd. Misalnya, untuk membuat pengguna baru dengan UID 1001, Anda dapat menjalankan perintah berikut:

sudo useradd -u 1001 nama_pengguna_baru


The Best Method to Copy Folders and Subfolders : Linux

Introduction

Copying folders and subfolders in a Linux environment is a common task, especially for system administrators, developers, and anyone working with files and directories. To efficiently duplicate directory structures, you need to use the right command and options. In this article, we’ll explore the best way to copy folders and subfolders in Linux using the cp command with the -r option.

The cp Command

The cp command in Linux is used to copy files and directories. To copy folders and their contents, including subfolders, you should use the -r or --recursive option. This option tells the cp command to recursively copy all files and subdirectories within the specified directory.

Syntax:

cp -r source_directory destination_directory

In your example:

cp -r Yusuf/. /var/www/html/web_yusuf/

Here, “Yusuf/” represents the source directory, and “/var/www/html/web_yusuf/” is the destination directory.

Why Use -r Option?

The -r option is crucial when copying folders and subfolders because it ensures that all contents within the source directory are copied, including files and nested directories. Without this option, the cp command would only copy the contents of the source directory, but not the subdirectories.

Advantages of Using -r with cp

  1. Preserves Directory Structure: The -r option preserves the entire directory structure, ensuring that the copied files and subfolders are placed in the correct hierarchy within the destination directory.
  2. Recursively Copies Subdirectories: It recursively copies all subdirectories and their contents, making it suitable for tasks that involve duplicating entire directory trees.
  3. Efficient: Using the -r option with cp is an efficient and quick way to copy large directory structures without the need for additional commands or scripting.

Example Use Cases

  1. Website Deployment: When deploying a website, you can use cp -r to copy all the website files, including subdirectories, to the web server’s directory.
  2. Backup: Creating backups of important files and directories, especially when dealing with complex data structures, becomes easy with the -r option.
  3. Software Development: Software developers often use this command to duplicate project directories, making it easier to experiment with code or create backups before making major changes.

Conclusion

In the Linux environment, the cp command with the -r option is the best way to copy folders and subfolders while preserving their structure and contents. Whether you’re managing a web server, working on software development projects, or simply need to back up important files, understanding how to use this command effectively is a valuable skill.

By mastering the cp -r command, you can confidently manage and duplicate directory structures in Linux, ensuring that your files and subfolders are copied accurately and efficiently. This knowledge is essential for anyone working in a Linux-based environment, from system administrators to developers and beyond.


What Is Composer

Composer, the indispensable PHP dependency management tool, empowers developers in numerous ways:

  1. Streamlined Dependency Management: Composer simplifies the process of managing dependencies using packages. With its intuitive interface, you can effortlessly handle your project’s external code libraries.
  2. Autoloading, Tailored to You: Composer supports both PSR-standard and custom file-based autoloading. This flexibility ensures that your application loads classes efficiently, enhancing overall performance.
  3. Optimization for Speed: Composer goes the extra mile by optimizing your code, resulting in faster execution. By utilizing compiler optimization techniques, it significantly boosts your application’s performance.
  4. Lifecycle Event Hooks: Composer is not just a tool; it’s a partner throughout your application’s lifecycle. It offers custom hooks into key events, like installation, updates, or initial creation. These hooks enable you to tailor Composer to your project’s unique needs.
  5. Stability Assurance: Composer provides stability checks, ensuring that your project stays robust and dependable.

Now, let’s dive into a crucial distinction:

Composer Install vs. Composer Update: Unveiling the Difference

When it comes to Composer, understanding the difference between composer install and composer update is essential:

Composer Update: This command accomplishes two vital tasks:

  • It updates all required packages to their latest compatible versions, keeping your project up to date.
  • It also updates the composer.lock file, which contains precise version information for your project’s dependencies.

Composer Install: On the other hand, composer install focuses on installing the dependencies specified in the composer.lock file. If the lock file doesn’t exist, this command seamlessly morphs into a composer update, automatically creating the composer.lock file for you after downloading the necessary dependencies.

A golden rule to remember: Reserve composer update for your local development environment only. Never use it in a production setting. This ensures that your production environment remains stable and reliable, free from unexpected updates that might cause compatibility issues.

In conclusion, Composer is your trusted ally in managing PHP dependencies efficiently. By mastering the nuances of composer install and composer update, you can harness its full potential to streamline your development process while maintaining a rock-solid production environment.


Free for dev Website

https://free-for.dev/#

Free for dev adalah website berisikan informasi list free software yang dapat digunakan oleh developer.
Ini adalah tempat yang sempurna bagi para profesional IT dan pengembang untuk menemukan berbagai alat, layanan, dan sumber daya yang dapat membantu mereka dalam menjalankan proyek-proyek pengembangan perangkat lunak mereka tanpa perlu mengeluarkan biaya tambahan.

Kunjungi situs web Free for Dev di https://free-for.dev/ dan temukan berbagai macam perangkat lunak yang dapat membantu Anda dalam proyek-proyek pengembangan Anda. Juga, Anda dapat berpartisipasi dalam pengembangan proyek ini di GitHub Free for Dev untuk memberikan kontribusi kepada komunitas pengembang.


Deploy Ruby on Rails with Capistrano and Ubuntu Server

Step-1: Install dependencies

sudo apt-get update && sudo apt-get -y upgrade
sudo apt install zlib1g-dev build-essential libssl-dev libreadline-dev
sudo apt install libyaml-dev libsqlite3-dev sqlite3 libxml2-dev
sudo apt install libxslt1-dev libcurl4-openssl-dev
sudo apt install software-properties-common libffi-dev nodejs
sudo apt install git
sudo apt install nginx
sudo apt install autoconf bison build-essential libssl-dev libyaml-dev libreadline6-dev zlib1g-dev libncurses5-dev libffi-dev  libgdbm-dev libsqlite3-dev

Step-2: Setup Rbenv

git clone https://github.com/rbenv/rbenv.git ~/.rbenv
echo 'export PATH="$HOME/.rbenv/bin:$PATH"' >> ~/.bashrc
echo 'eval "$(~/.rbenv/bin/rbenv init - bash)"' >> ~/.bashrc
echo 'eval "$(rbenv init -)"' >> ~/.bashrc
source ~/.bashrc
rbenv init
type rbenv

Step-3: Setup Ruby Build

git clone https://github.com/rbenv/ruby-build.git "$(rbenv root)"/plugins/ruby-build

Step-4: Install Ruby

RUBY_CONFIGURE_OPTS=--disable-install-doc rbenv install 2.7.5
rbenv rehash
echo "gem: --no-document" > ~/.gemrc

Step-5: Install Rails

gem install rails 

Step-6: Install Puma

gem install puma

Step-7: Install Bundler

gem install bundler -v 2.1.4 --no-ri --no-rdoc
// or 
gem install bundler --no-ri --no-rdoc

Step-8: Install Node-JS and Yarn

sudo apt-get install nodejs
sudo apt install yarn

Step-9: Install MySQL Dependencies

sudo apt-get install libmysqlclient-dev

gem install mysql2 -v '0.5.0' --source 'https://rubygems.org/’

Step-10: Copy SSH public key to Gitlab Repo

ssh-keygen -o -t rsa -b 4096 -C "[email protected]"

setelah create ssh, copy ssh public ke Gitlab repo

lalu adjust permission folder di ubuntu server

chmod o+x $HOME

Step-11: Add capistrano dependencies into Gemfile

group :development do
  gem "web-console"
  gem 'capistrano'
  gem 'capistrano-rails'
  gem 'capistrano-rbenv'
  gem 'capistrano-sidekiq'
  gem 'capistrano-bundler'
  gem 'capistrano3-puma'
end

Step-12: Init capistrano

cd root-project

cap install STAGES=production

Step-13: Write config file app/shared/config/database.yml

# SQLite. Versions 3.8.0 and up are supported.
#   gem install sqlite3
#
#   Ensure the SQLite 3 gem is defined in your Gemfile
#   gem "sqlite3"
#
default: &default
  adapter: sqlite3
  pool: <%= ENV.fetch("RAILS_MAX_THREADS") { 5 } %>
  timeout: 5000

development:
  <<: *default
  database: db/development.sqlite3

# Warning: The database defined as "test" will be erased and
# re-generated from your development database when you run "rake".
# Do not set this db to the same as development or production.
test:
  <<: *default
  database: db/test.sqlite3

production:
  <<: *default
  database: db/production.sqlite3

Step-14: Setting puma

https://gist.github.com/arteezy/5d53d99f6ee617fae1f0db0576fdd418

sudo vim /etc/systemd/system/puma_timetable_production.service

[Unit]
Description=Puma HTTP Server for timetable (production)
After=network.target


[Service]
Type=simple
User=ubuntu
WorkingDirectory=/home/ubuntu/timetable/current
# Support older bundler versions where file descriptors weren't kept
# See https://github.com/rubygems/rubygems/issues/3254
ExecStart=/home/ubuntu/.rbenv/bin/rbenv exec bundle exec --keep-file-descriptors puma -C /home/ubuntu/timetable/shared/puma.rb
ExecReload=/bin/kill -USR1 $MAINPID
StandardOutput=append:/home/ubuntu/timetable/current/log/puma.access.log
StandardError=append:/home/ubuntu/timetable/current/log/puma.error.log


Restart=always
RestartSec=1

SyslogIdentifier=puma

[Install]
WantedBy=multi-user.target

sudo systemctl daemon-reload

sudo systemctl start puma_timetable_production.service

sudo systemctl restart puma_timetable_production.service

sudo systemctl status puma_timetable_production.service

sudo systemctl enable puma_timetable_production.service

Step-15: Set secret key

run rake secret in your local machine and this will generate a key for you

make config/secrets.yml file

add the generated secret key here

production:
 secret_key_base: asdja1234sdbjah1234sdbjhasdbj1234ahds…

and redeploy the application after commiting.

Step-16: Setting NGINX

nginx.conf

upstream timetable_app {
  server unix:/home/ubuntu/timetable/shared/tmp/sockets/puma.sock fail_timeout=0;
}

server {
  listen 80;
  server_name _;

  root /home/ubuntu/timetable/current/public;

  location / {
    try_files $uri/index.html $uri @timetable_app;
  }

  location @timetable_app {
    proxy_set_header X-Real-IP $remote_addr;
    proxy_set_header X-Forwarded-For $proxy_add_x_forwarded_for;
    proxy_set_header X-Forwarded-Proto $scheme;
    proxy_set_header Host $http_host;
    proxy_redirect off;
    proxy_pass http://timetable_app;
  }

  error_page 500 502 503 504 /500.html;
  client_max_body_size 4G;
  keepalive_timeout 10;
}


Rake vs Rails

Rake dan rails keduanya adalah command-line tools digunakan di Ruby on Rails application.

Rake adalah sebuah build dan task automation tool di Ruby.
beberapa contoh common tasks menggunakan Rake di Ruby on Rails:

  • Running database migrations: rake db:migrate
  • Create secret : rake secret
  • Running Test: rake test
  • Compiling assets: rake assets:precompile
  • Seeding database: rake db:seed

Rails adalah command-line tool untuk Ruby on Rails itu sendiri.
beberapa contoh common tasks menggunakan Rails di Ruby on Rails:

  • Creating new application: rails new api-application
  • Starting server: rails server
  • Running Rails console: rails console

Kesimpulannya, rake dan rails adalah command line tools yang digunakan di Ruby on Rails application.


Implementing an LRU Cache with Redis

Caching Policy

We have developed a system that uses Redis to cache query results from the database. However, this system is not very efficient because it simply saves each result to the Redis cache and keeps it there indefinitely. This can lead to the cache using up all of the computer’s available RAM over time.

To solve this problem, we need to delete some of the items in the cache and only keep the ones that are most likely to be read again. One way to do this is to implement an LRU (Least Recently Used) caching policy, which deletes the items in the cache that were used the least recently.

Fortunately, Redis already includes an LRU mechanism, so we don’t have to worry about implementing it in the application layer. Instead, we can simply configure Redis to delete items using an LRU policy. To do this, we just need to add two arguments to the command that starts Redis. The first argument limits the amount of memory Redis can use (in this example, we’ve chosen 512 MB), while the second argument tells Redis to use the LRU policy. The command will look like this:

redis-server --maxmemory 10mb --maxmemory-policy allkeys-lru

By using this configuration, we can ensure that our Redis cache remains efficient and doesn’t use up all of the available RAM.


Users Linux


List User Linux

compgen -u


How to Add an Existing User to a Group

To add an existing user to a secondary group, use the usermod -a -G command followed the name of the group and the user:

sudo usermod -a -G groupname username

For example, to add the user linuxize to the sudo group, you would run the following command:

sudo usermod -a -G sudo linuxize

Always use the -a (append) option when adding a user to a new group. If you omit the -a option, the user will be removed from any groups not listed after the -G option.

On success, the usermod command does not display any output. It warns you only if the user or group doesn’t exist.


Laradock Guzzle Issue or Curl Issue Connection Refused

### NGINX Server #########################################
    nginx:
      build:
        context: ./nginx
        args:
          - CHANGE_SOURCE=${CHANGE_SOURCE}
          - PHP_UPSTREAM_CONTAINER=${NGINX_PHP_UPSTREAM_CONTAINER}
          - PHP_UPSTREAM_PORT=${NGINX_PHP_UPSTREAM_PORT}
          - http_proxy
          - https_proxy
          - no_proxy
      volumes:
        - ${APP_CODE_PATH_HOST}:${APP_CODE_PATH_CONTAINER}${APP_CODE_CONTAINER_FLAG}
        - ${NGINX_HOST_LOG_PATH}:/var/log/nginx
        - ${NGINX_SITES_PATH}:/etc/nginx/sites-available
        - ${NGINX_SSL_PATH}:/etc/nginx/ssl
      ports:
        - "${NGINX_HOST_HTTP_PORT}:80"
        - "${NGINX_HOST_HTTPS_PORT}:443"
        - "${VARNISH_BACKEND_PORT}:81"
      depends_on:
        - php-fpm
      networks:
         frontend:
            aliases:
              - ssp-api.test
         backend:
            aliases:
              - ssp-api.test


Look at this :

networks:
         frontend:
            aliases:
              - ssp-api.test
         backend:
            aliases:
              - ssp-api.test

it fix our issue


Development process of Product

https://blog.pragmaticengineer.com/scaling-engineering-teams-via-writing-things-down-rfcs/


Cara Running Container Mysql di Macbook M1

Run on Terminal :

  • M1 :
    docker run -d -p 3306:3306 --name mysql_container --platform linux/x86_64 --env MYSQL_ROOT_PASSWORD=12345 mysql


  • Intel :
    docker run -d -p 3306:3306 --name mysql_container --env MYSQL_ROOT_PASSWORD=12345 mysql


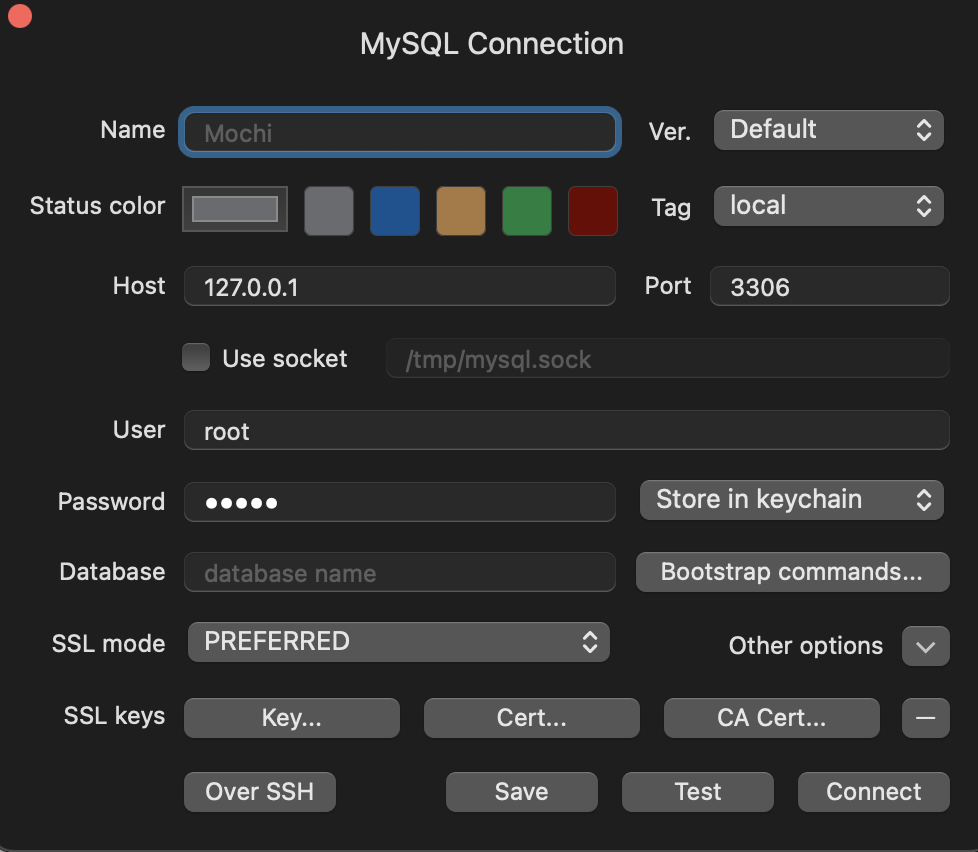
Testing Koneksi dan masuk ke database dengan aplikasi tablePlus, menggunakan konfigurasi berikut :

Host : 127.0.0.1

User : root

Password : 12345

Port : 3306


Cara jadi DevOps

Development adalah tim yang membuat aplikasi.
Operations adalah tim yang tugasnya mendeploy aplikasi dan menjaga server

Syarat :

  • Faham dasar dasar linux
  • Mahir menggunakan CLI
  • Bisa menggunakan perintah Shell
  • Mengerti dasar file system linux
  • Bisa mengelola server
  • Bisa mengakses server melalui SSH
  • Dasar-dasar networking dan security
  • Firewall
  • Load Balancer
  • HTTP/HTTPS
  • DNS
  • Container (Docker)
  • Containuous (CI/CD)

Role terkait :

  • Network Engineer
  • Security Engineer
  • Sysadmin


Elasticsearch, Logstash & kibana

Centralized Log Menggunakan ELK Stack


sudo apt update

sudo apt upgrade -y sudo apt install htop git nginx curl unzip zip exif -y

sudo apt install libmcrypt-dev libjpeg-dev libpng-dev libjpeg-dev libfreetype6-dev libbz2-dev libzip-dev -y


Installing Java on Ubuntu

sudo apt-get install default-jre

java -version


Adding Elastic packages to your instance

curl -fsSL https://artifacts.elastic.co/GPG-KEY-elasticsearch | sudo apt-key add

echo “deb https://artifacts.elastic.co/packages/7.x/apt stable main” | sudo tee -a /etc/apt/sources.list.d/elastic-7.x.list


sudo apt update

sudo apt install elasticsearch


sudo vim /etc/elasticsearch/elasticsearch.yml

. . .
# ———————————- Network ———————————–
#
# Set the bind address to a specific IP (IPv4 or IPv6):
#
network.host: localhost
. . .


sudo systemctl start elasticsearch

sudo systemctl enable elasticsearch


Check runnning

sudo lsof -i -P -n | grep LISTEN | grep 9200

curl -XGET ‘http://localhost:9200/_all/_search?q=*&pretty’

curl -X GET “localhost:9200”


Install Kibana

sudo apt install kibana

sudo systemctl enable kibana
sudo systemctl start kibana

sudo lsof -i -P -n | grep LISTEN | grep 5601


sudo vim /etc/nginx/sites-available/logs.skul.id


server {
    listen 80;

    server_name your_domain;

    auth_basic "Restricted Access";
    auth_basic_user_file /etc/nginx/htpasswd.users;

    location / {
        proxy_pass http://localhost:5601;
        proxy_http_version 1.1;
        proxy_set_header Upgrade $http_upgrade;
        proxy_set_header Connection 'upgrade';
        proxy_set_header Host $host;
        proxy_cache_bypass $http_upgrade;
    }
}


sudo ln -s /etc/nginx/sites-available/your_domain /etc/nginx/sites-enabled/your_domain

sudo nginx -t

sudo systemctl reload nginx

http://your_domain/status


Install Logstash

sudo apt install logstash

sudo systemctl start logstash

sudo systemctl enable logstash


Install filebeat

sudo apt install filebeat

sudo vim /etc/filebeat/filebeat.yml


https://www.digitalocean.com/community/tutorials/how-to-install-elasticsearch-logstash-and-kibana-elastic-stack-on-ubuntu-20-04

https://serverfault.com/questions/730622/how-to-format-log-data-before-forwarding-them-as-json-to-elasticsearch

https://flareapp.io/blog/30-how-we-use-elasticsearch-kibana-and-filebeat-to-handle-our-logs

https://devconnected.com/monitoring-linux-logs-with-kibana-and-rsyslog